Getting started as a teacher
This guide takes you from a brand new account to a finished lesson: profile, bookable hours, a scheduled session, the live classroom, and the wrap-up that closes it.
Your dashboard at a glance
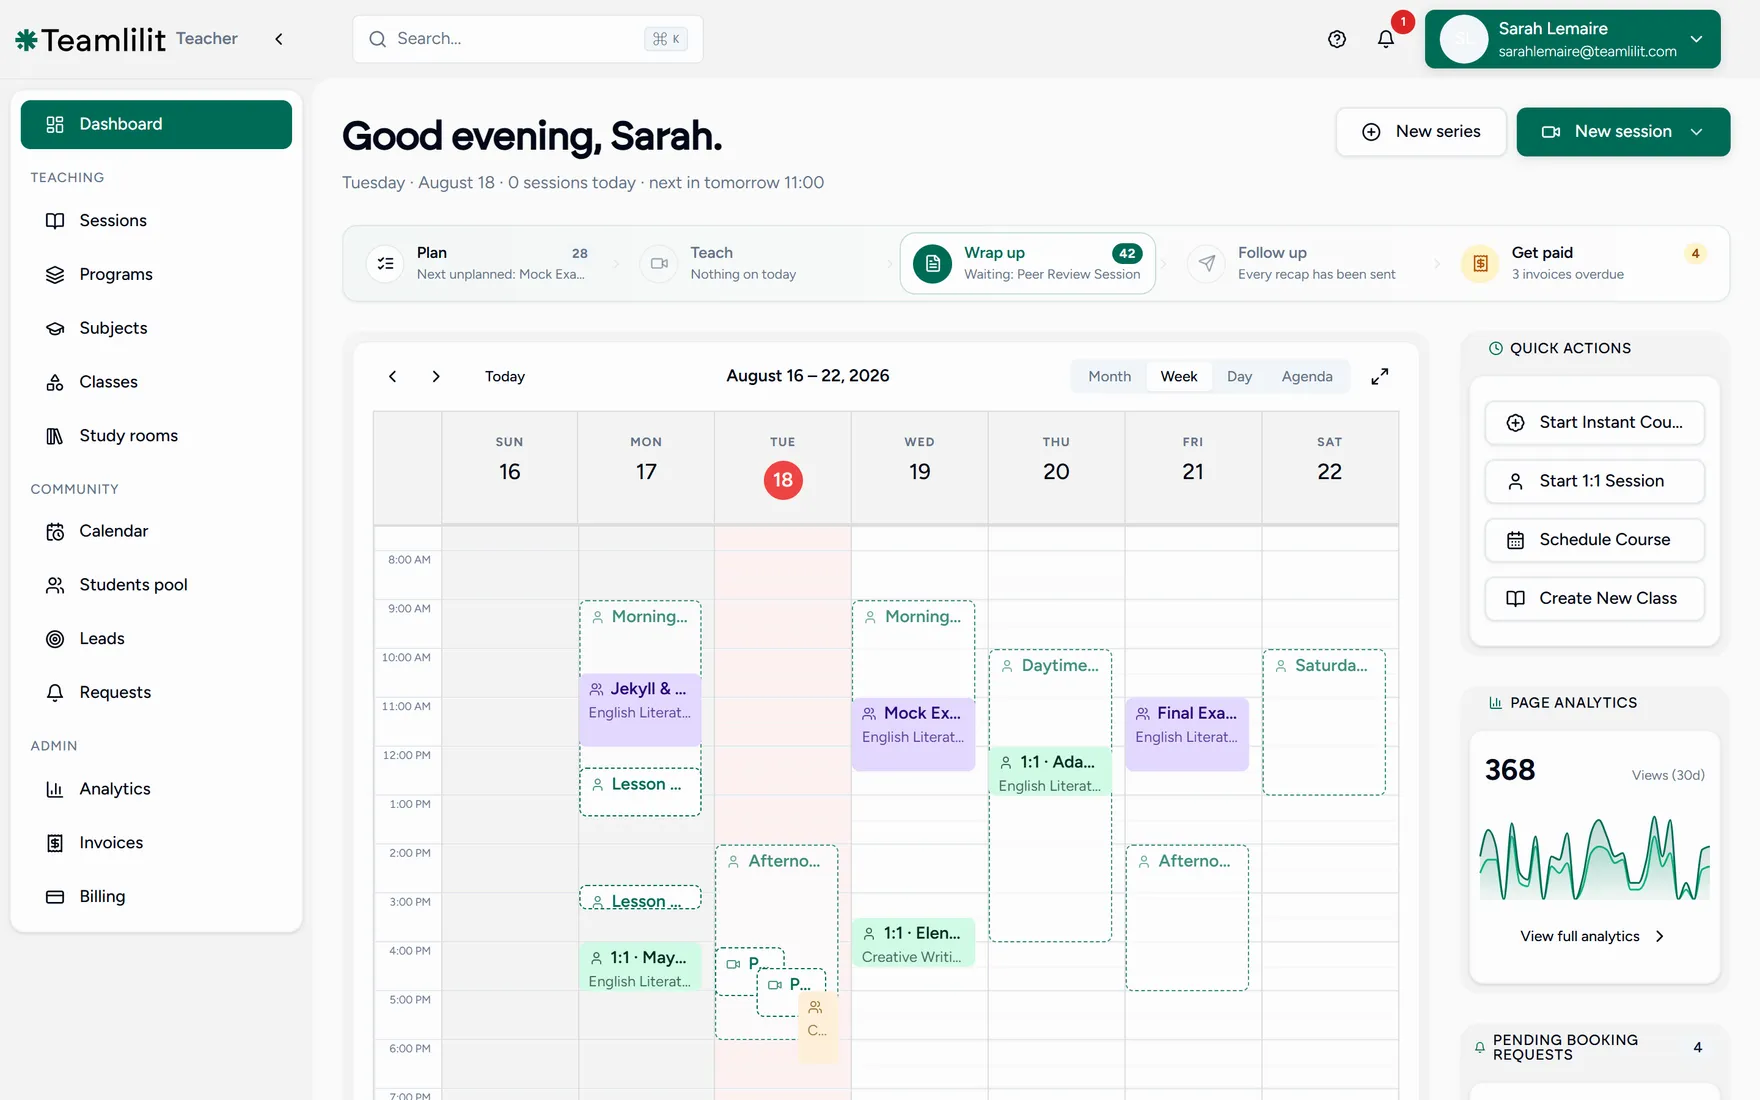
Four things are worth knowing before you touch anything:
- The strip across the middle is one lesson’s life: Plan, Teach, Wrap up, Follow up, Get paid. Each step shows how many lessons are sitting at that stage, so anything you have forgotten is visible without hunting for it.
- The calendar underneath is your week. Switch it to Month, Day or Agenda with the buttons above it.
- Quick actions on the right start the things you do most: an instant course, a 1:1 session, a scheduled course, or a new class.
- New session and New series sit top right on every screen.
The menu
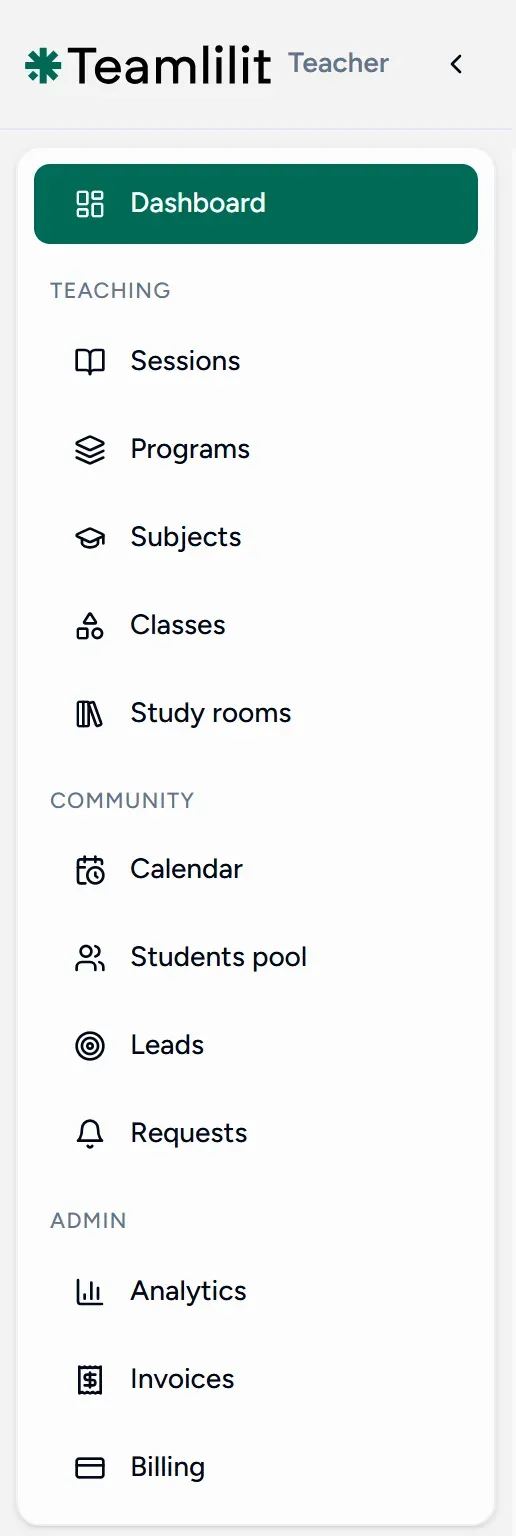
It is grouped by what you are doing:
- Teaching: Sessions, Programs, Subjects, Classes.
- Community: Calendar, Students pool, Leads, Requests.
- Admin: Analytics, Invoices, Billing.
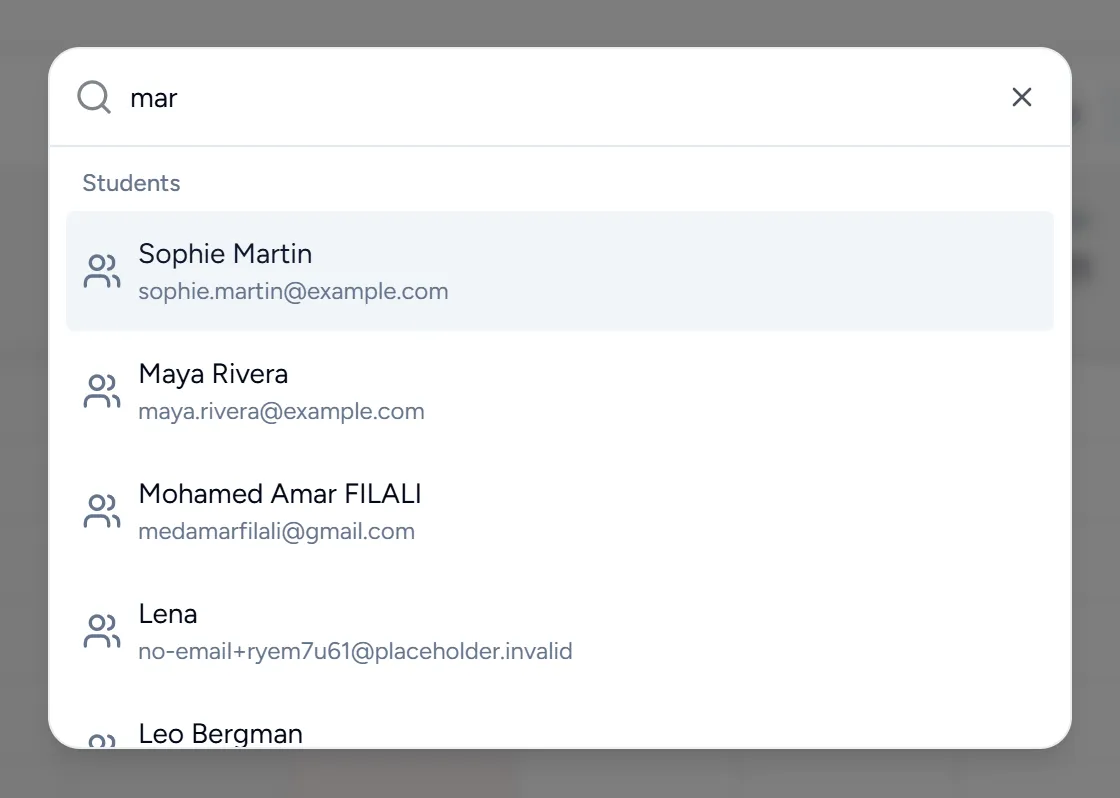
Press Ctrl + K (Cmd + K on a Mac) anywhere in the app to search across your students, sessions and classes. It is almost always faster than navigating to them.
Step 1: set yourself up to be booked
Finish your teaching profile
Open Settings from your account menu and complete the Profile tab: a photo, a short bio, and the subjects you teach. This is exactly what a student sees on your public booking page, so it is worth ten minutes.
Open the hours you are willing to teach
In Calendar, drag over empty time in the week grid and choose Set availability. You set a start and end time, and how long each bookable slot inside that window should be.
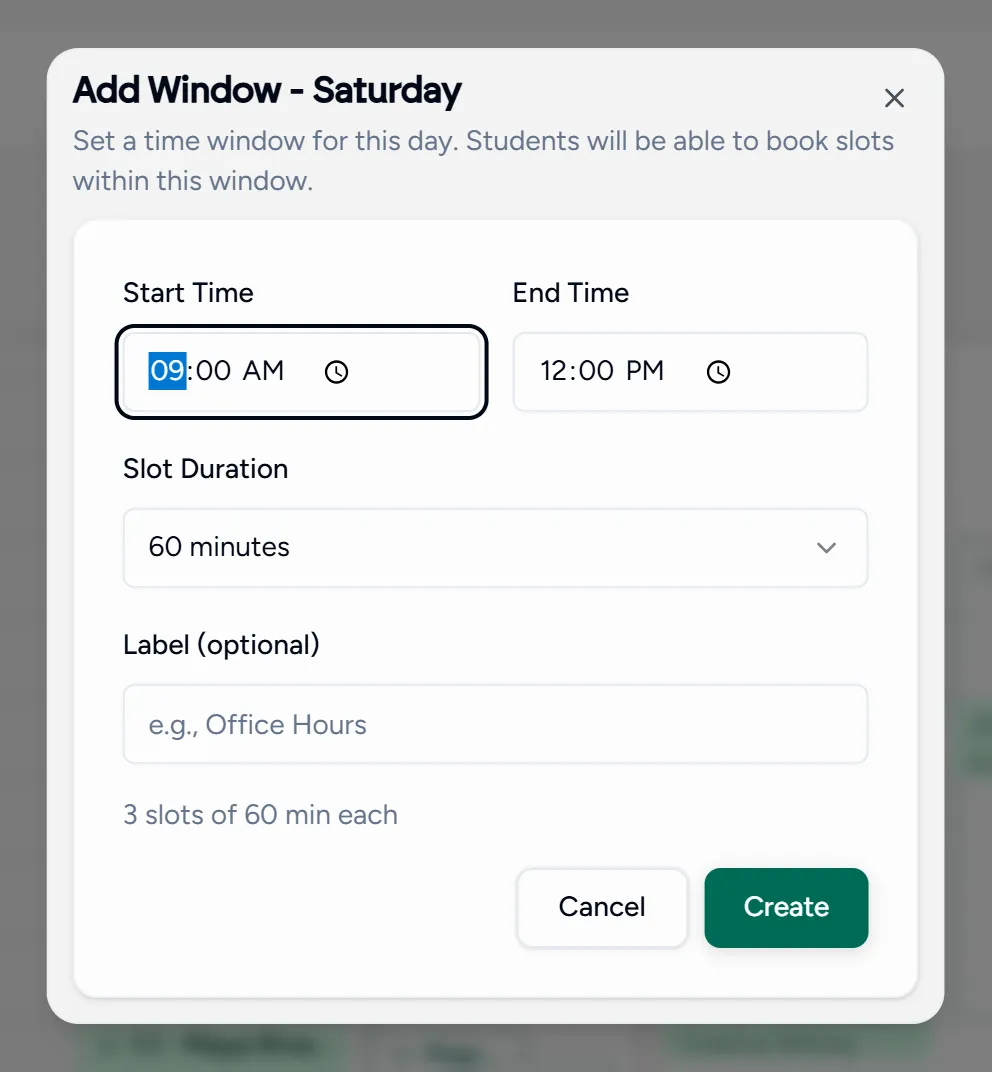
Those windows are what students can book. Full detail in Availability and calendar.
Share your booking page
Every teacher gets a page at teamlilit.com/t/your-username showing your
profile and your open slots. Copy the link, or generate a QR code for a flyer.
See Your public booking page.
Step 2: create your first lesson
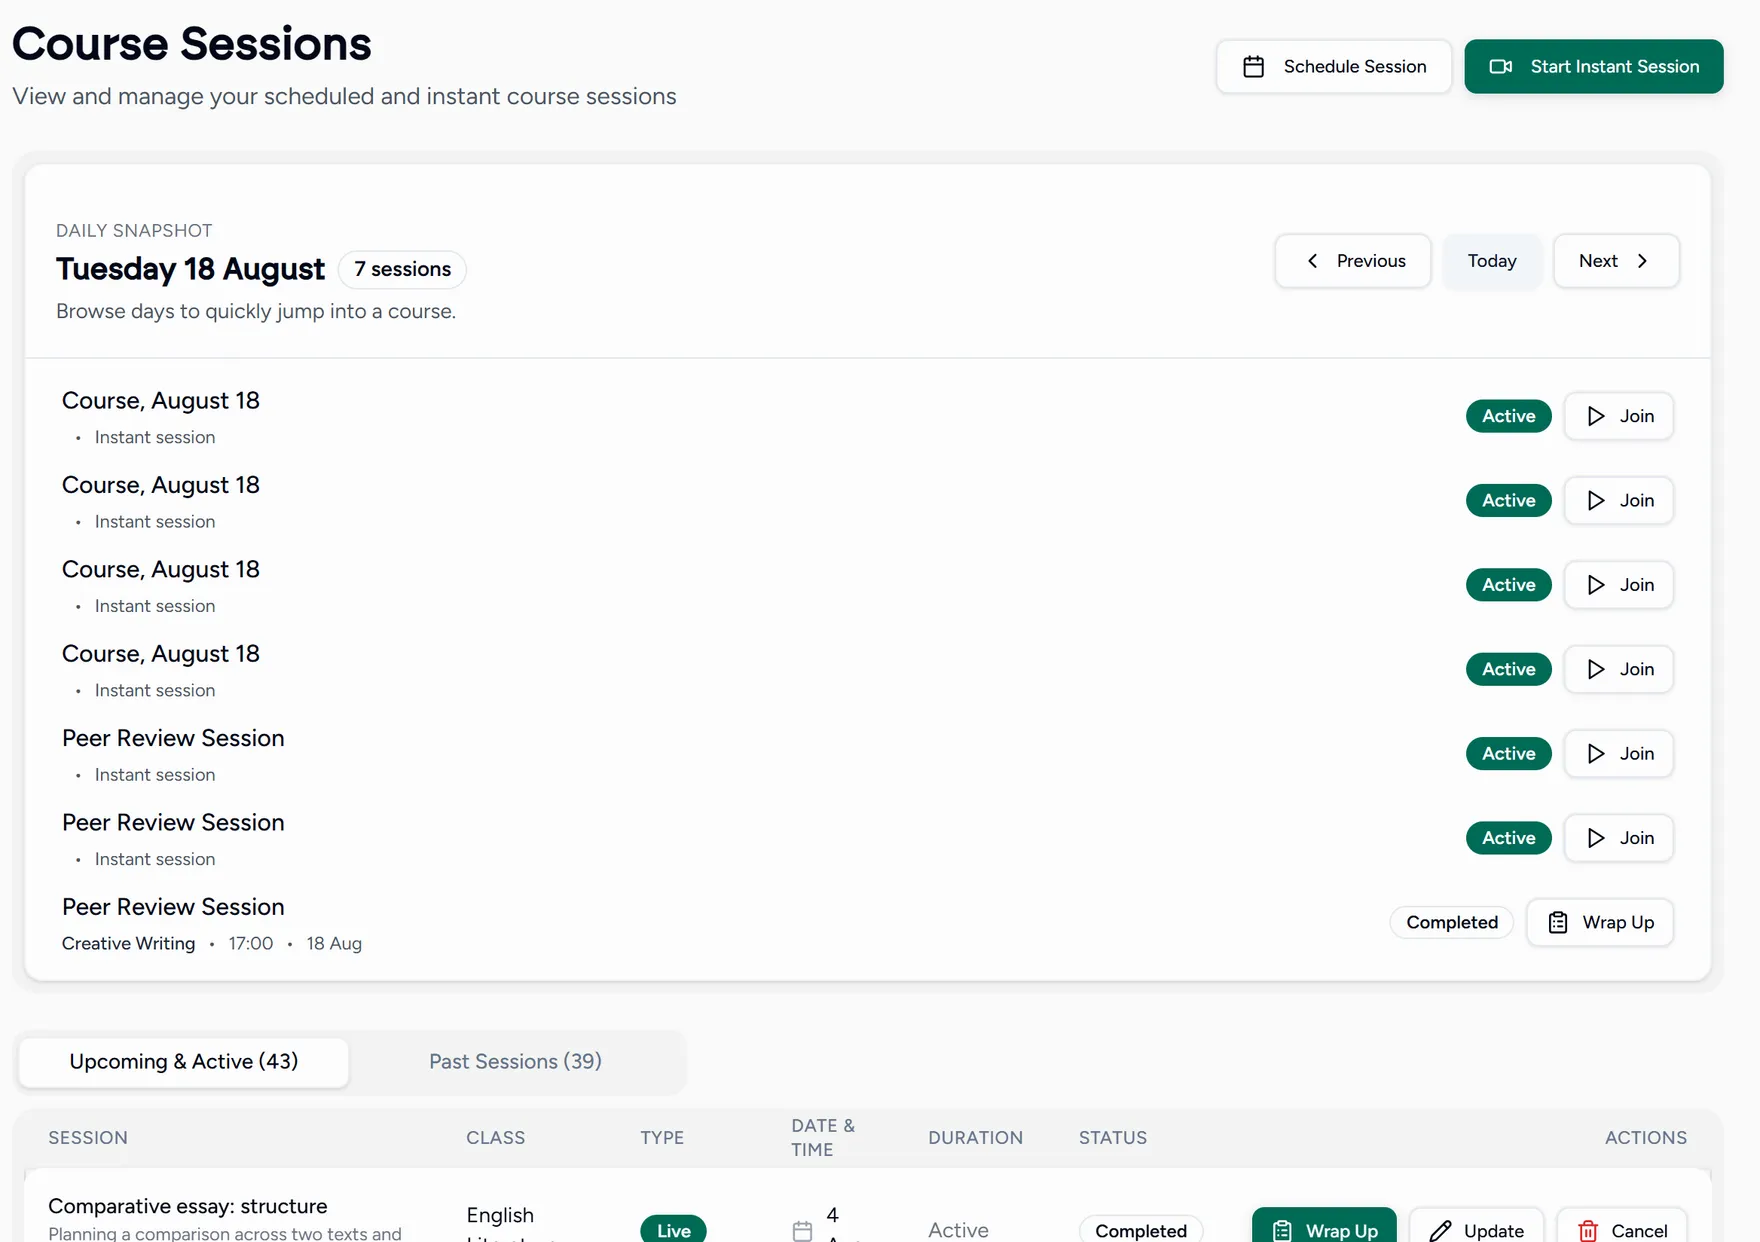
Open Sessions
Sessions lists everything you have scheduled, split into future and past.
Add a session
Choose New session, then fill in the title, subject, date, time, duration and how many students can attend.
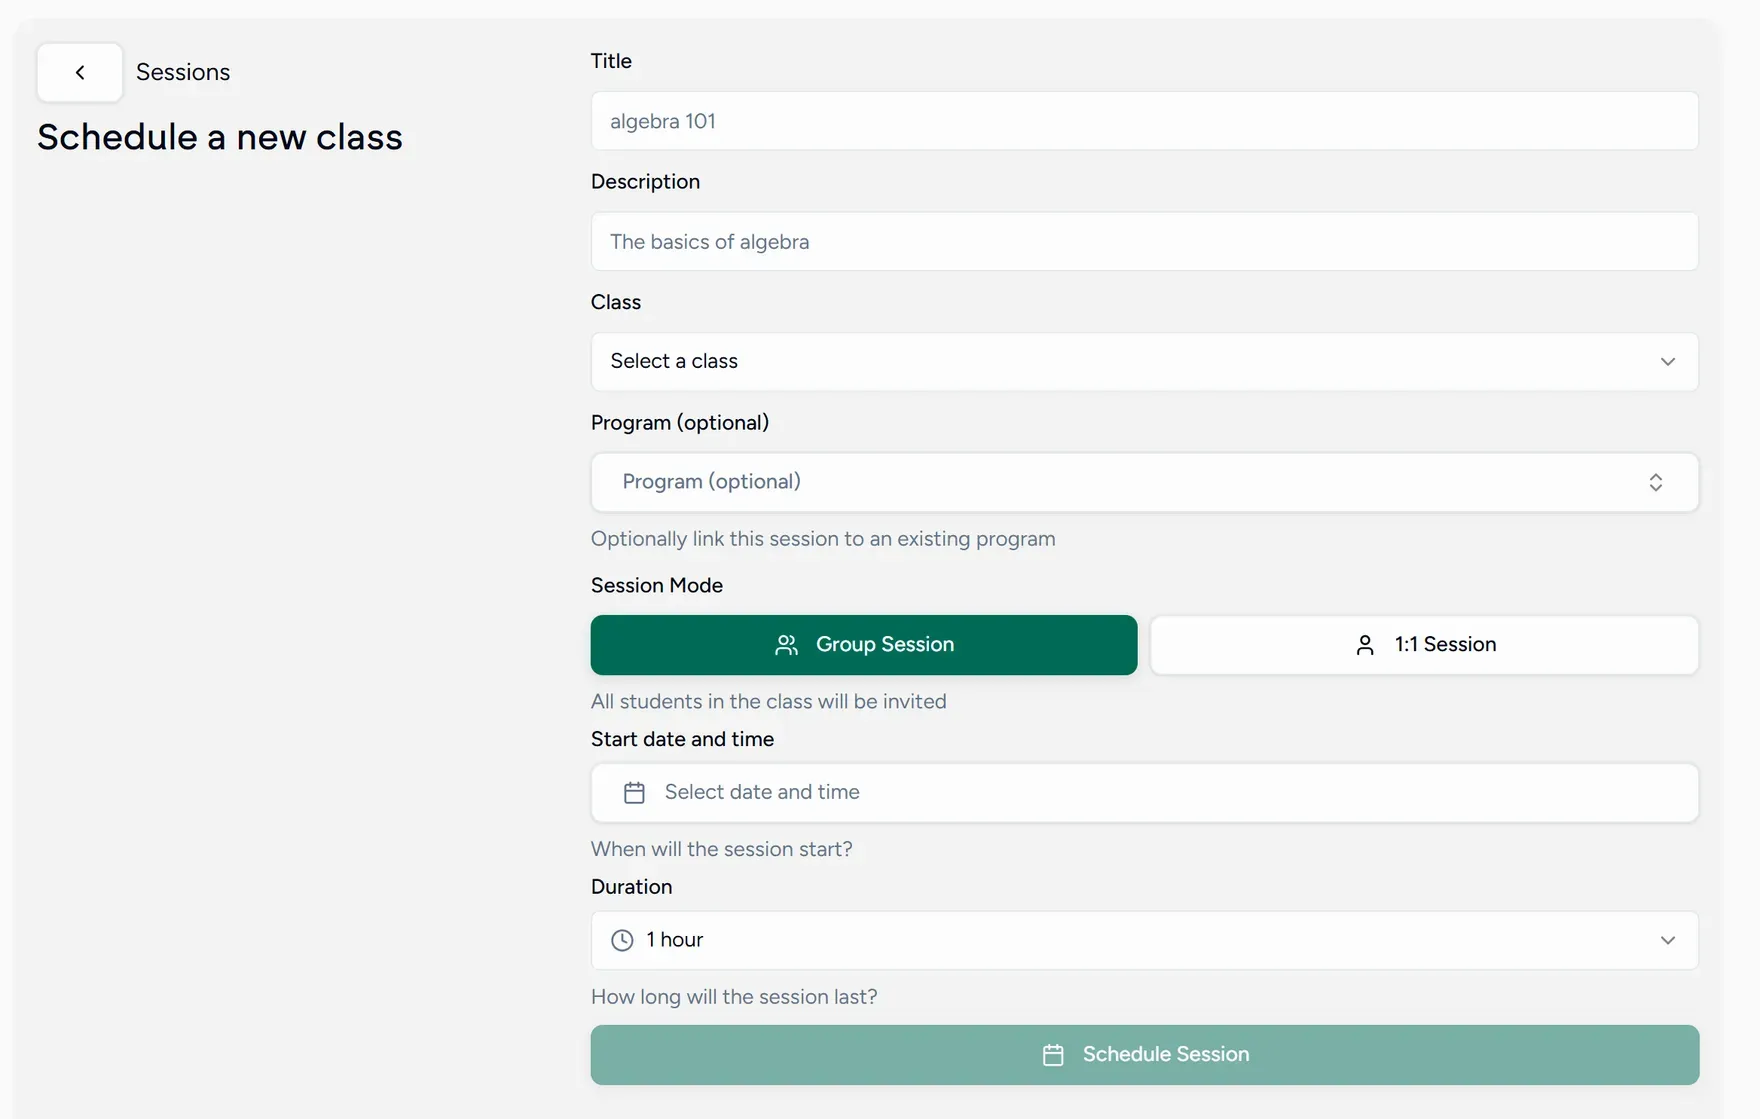
Step by step detail lives in Creating a session. Teaching right now instead of later? Use an instant session.
Invite the students
Invite by email from Students pool, or send them your booking link and let them pick a slot. See Managing your students.
How many students can join one session depends on your plan. Solo teaches one to one, Pro allows groups, and Academy allows larger groups. See Plans and limits.
Step 3: teach it
When the time comes, open the session and choose Start. The classroom opens in your browser with video, screen sharing, a shared whiteboard, chat and file sharing.
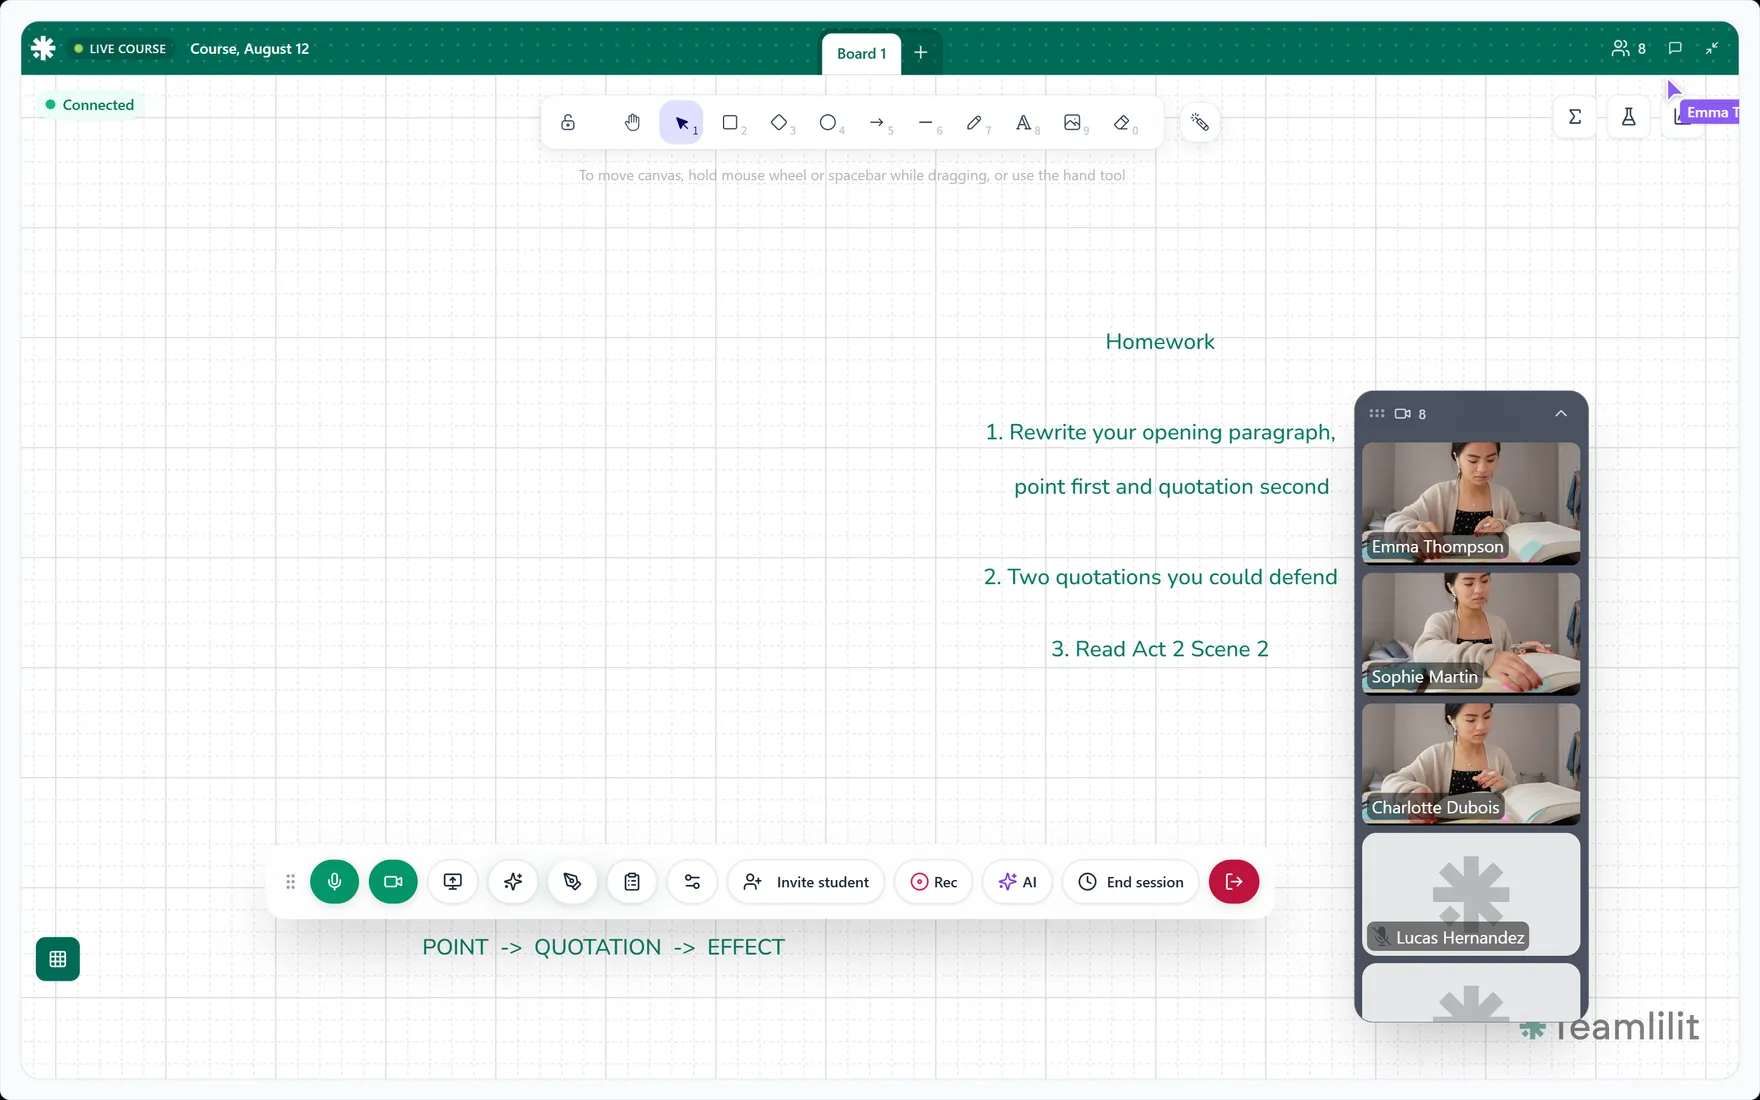
See Classroom controls for what every button does.
Step 4: close it out
After the lesson, write the wrap-up: attendance, notes, and homework per student. It becomes that student’s record, and it is what a parent sees if you send a recap.
Teamlilit can draft the summary for you from the lesson audio. See AI session summaries.
Once you are comfortable
- Programs group lessons into a recurring series or a full curriculum.
- Subjects categorise what you teach and show on your booking page.
- Classes group students who learn together, so you invite the group rather than the people.
- Invoices turn taught hours into a bill without retyping anything.